

Two years ago, sitting down and standing up from the toilet was the hardest part of my day. After my left knee replacement, I dreaded that little moment more than the stairs, more than the walk to the mailbox, more than anything else in the house. My physical therapist kept reminding me to lead with my stronger leg, but that only works when you have something solid to push against. A towel bar is not solid. A shampoo bottle is not solid. My daughter Kathleen watched me brace one hand on the sink and the other on the wall and said, gently, "Mom, we are getting you a rail." She was right. We ordered the Medline toilet safety rail, and I installed it myself in under ten minutes with no tools and no swearing. Here is exactly how I did it, and what I would tell you before you try it. I am 72, I live alone, and I do not own a drill. If I could install this, you can too.
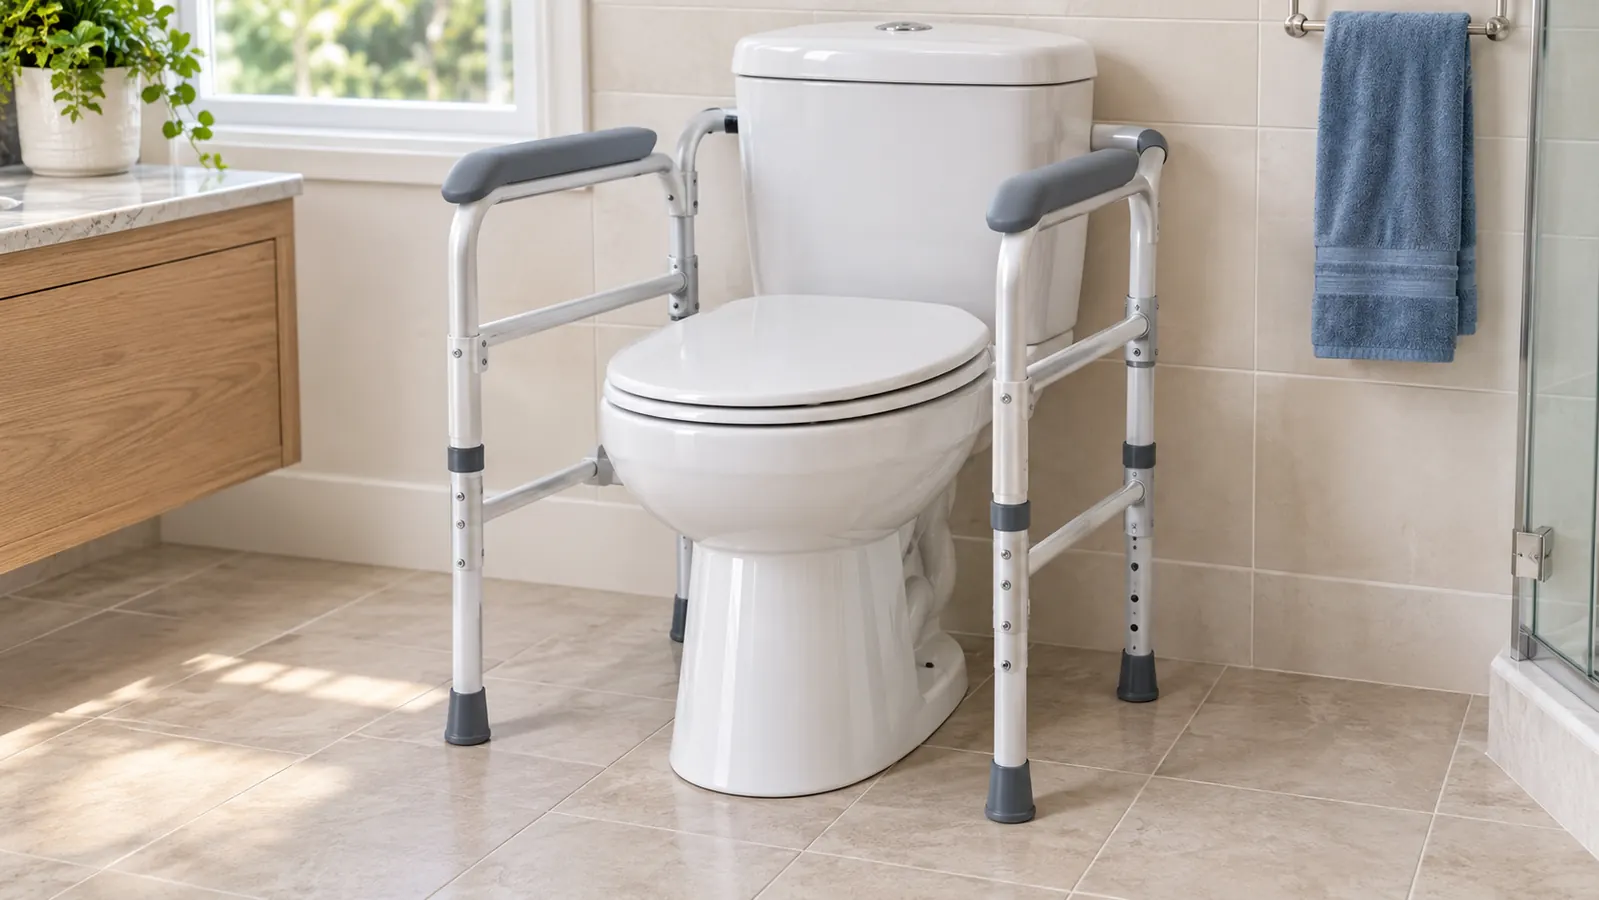
The rail arrived in a plain box, and I will be honest: I expected something that looked like medical equipment and felt like a project. It was neither. The aluminum frame was light enough for me to carry with one hand, the armrests were padded, and the whole thing folded flat like a step stool. Kathleen offered to stay and help, and I told her I would call if I got stuck. I did not call. That is the review you are actually here for, so let me walk you through the five steps the way I wish someone had walked me through them.
The rail that got me through the hardest part of recovery
The Medline toilet safety rail adjusts to fit most toilets, folds flat when you do not need it, and took me under ten minutes to install with zero tools. Check today's price on Amazon and see if it fits your bathroom.
Amazon Check Today's Price on Amazon →Step 1: Measure the toilet and the space around it
Before you open the box, measure. The Medline toilet safety rail fits toilets with a seat depth around 16.75 inches and an interior height around 31.5 inches, but the numbers that matter most in a real bathroom are the width between the arms and the space on either side of the toilet. The arms adjust to fit widths between 18 and 24 inches, and the frame itself is about 19 to 22 inches wide depending on how you set it. That sounds obvious, but I nearly ordered a different rail that would have been too narrow for our toilet and too wide for the corner it sits in. Measure first, and the whole install gets easier.
Grab a tape measure and check three things: the width of the toilet bowl at its widest point, the distance from the toilet to the wall on each side, and the clearance in front. You want enough room to stand comfortably between the arms and enough room on at least one side to grip the rail while you turn. In my bathroom, the toilet sits close to the tub on one side and open floor on the other, so the adjustable width was the feature I needed most. If your toilet is in a tight corner, measure twice. The rail needs a little breathing room to sit level. Give yourself a minute to think about how you will use it in the dark, because the middle-of-the-night trip is when you will need it most.
Also check the floor. The Medline rail stands on its own legs rather than bolting to the wall or the floor, which is exactly why it needs no tools, but it also means the floor underneath has to be reasonably flat. A thick bath mat or a warped tile can make the frame rock slightly. I set mine on the bare tile, and it has not moved in two years.
Step 2: Set the width before you bring it to the toilet
The Medline rail comes folded flat in the box, which is part of why it is so easy to handle. The included components are simply the rail itself, and the aluminum frame keeps the whole thing light enough for me to carry with one hand. At 4.4 pounds, it is not a heavy piece of equipment. My knee was the problem, not my arms, so I could manage it fine.
Before you position it around the toilet, set the width between the arms. The rail adjusts from roughly 18 to 24 inches between the armrests. I set mine wide enough that I could sit down without bumping the arms, then tightened it so it would not drift. The adjustment does not take any strength. It is the kind of thing you can do sitting on the edge of the bathtub if standing is uncomfortable. The first time I set it, I made it too narrow and had to start over. It took forty seconds.
Here is a tip my physical therapist gave me that I almost skipped: set the width slightly wider than you think you need. When you are tired at the end of the day, your aim is worse, and a rail that feels snug in the morning can feel cramped at night. A little extra room costs nothing and saves you from bruising your hips on the armrests.
Step 3: Slide the rail around the toilet and check the height
This is the whole job: slide the open side of the rail around the toilet bowl so the seat sits inside the frame. The rail wraps around the base of the toilet, and the armrests end up on either side of you at about the height of a chair arm. There is no clamping, no screwing, no bolting. The weight of the frame and your grip do the work.
Once it is in place, check the height. The rail adjusts from a minimum height of 27.5 inches up to 31.5 inches at the armrests. The right height is the one that lets you push down with a mostly straight arm, not a bent elbow and not a stretched reach. My physical therapist set the rule simply: when you stand, your hand should land on the armrest without you leaning sideways to find it. Do not trust the first height that looks right. Sit down and try it.
Adjust it while you are standing next to the toilet, not while you are sitting on it. Stand tall, let your arms hang, and set the armrest about level with your wrist. Then sit down and test it. If you have to reach up or hunch over to grip the rail, adjust it again. It takes longer to read about than to do. The whole height adjustment is a matter of lifting the armrest and letting it settle into the next setting.

Step 4: Test it sitting and standing before you trust it
Do not declare victory the second the rail is around the toilet. Sit down and stand up three or four times, slowly, using both armrests. The padded armrests give you a secure grip even when your hands are a little damp, and the scratch-resistant powder coating on the aluminum frame means you do not have to worry about roughing it up. I tested mine the afternoon Kathleen brought it over, and I remember laughing out loud because I stood up without grabbing the sink for the first time in weeks. Kathleen laughed at me, but she was laughing with me, and that was the moment I stopped feeling like a patient.
Pay attention to where your feet land. The rail does not move, but you will, and you want your feet to find the same spot every time. I taught myself to step in with my stronger leg first, grip both armrests, and push. After a few days it became automatic, and after a few weeks I stopped thinking about it entirely. I still do the same three-count today, two years later. That is the goal. You are not looking for a dramatic change on day one. You are looking for the steadiness that builds over days and weeks of use.
One warning: check the weight rating in the listing before you rely on it. I never quote a number for this rail because the rating that matters is the one on the box you receive. If you are close to that number, talk to your doctor or physical therapist about whether a rail is the right support for you. There is no shame in needing something sturdier. The shame would be finding out the hard way.
Step 5: Fold it when you need the floor space
The Medline rail folds flat when you do not need it, and that is the feature I did not know I needed until I had it. The armrests fold down so the whole frame lies flat against the floor, which means you can tuck it beside the toilet, behind the door, or in a closet. I fold mine when I am cleaning the bathroom, because the floor is easier to mop without it in the way.
Folding takes about five seconds and no tools. The rail does not come apart into pieces you can lose. It is one solid aluminum frame that folds into a flat shape about 29 inches long, 19.8 inches wide, and 3 inches tall, and it takes up almost no room. It stores against the wall behind my bathroom door, and I pull it out only when I need it. Some people leave it out all the time, and that is fine too. The point is that you have the choice.
If you are helping someone else set up a bathroom, this is also the rail to bring. It is light enough to lift into a car trunk, and it does not need a wall, a floor flange, or a plumber. The second time I installed one, it took about the same ten minutes, no tools, no instructions needed. It is the rare piece of mobility gear that makes life easier for the person using it and for the person helping them.
What Else Helps
The rail does its job, but it is not the whole answer. For me, the rail handles the toilet, my cane handles the short trips around the house, and my rollator handles the outings where I need a seat. Each piece does its own job, and none of them replaces the others. If you are setting up a bathroom after a surgery, I would also put a non-slip bath mat on the floor and a night light in the outlet near the toilet, because the middle-of-the-night trip is when you are least steady. And please, ask your doctor or physical therapist about the right height and the right fit for your body before you buy. I did, and it made all the difference. The rail is a tool, not a treatment. It gives you something solid to push against so the rest of your recovery can happen at its own pace.
I stood up without grabbing the sink for the first time in weeks. That was the day I stopped dreading the bathroom.
Ten minutes, no tools, and the hardest part of my day got easier
The Medline toilet safety rail is still on my bathroom floor two years later. If you or someone you love is bracing against the sink, check today's price on Amazon and see how easy the install really is.
Amazon Check Today's Price on Amazon →